
POP Setup
Configuring POP3 Mac Mail
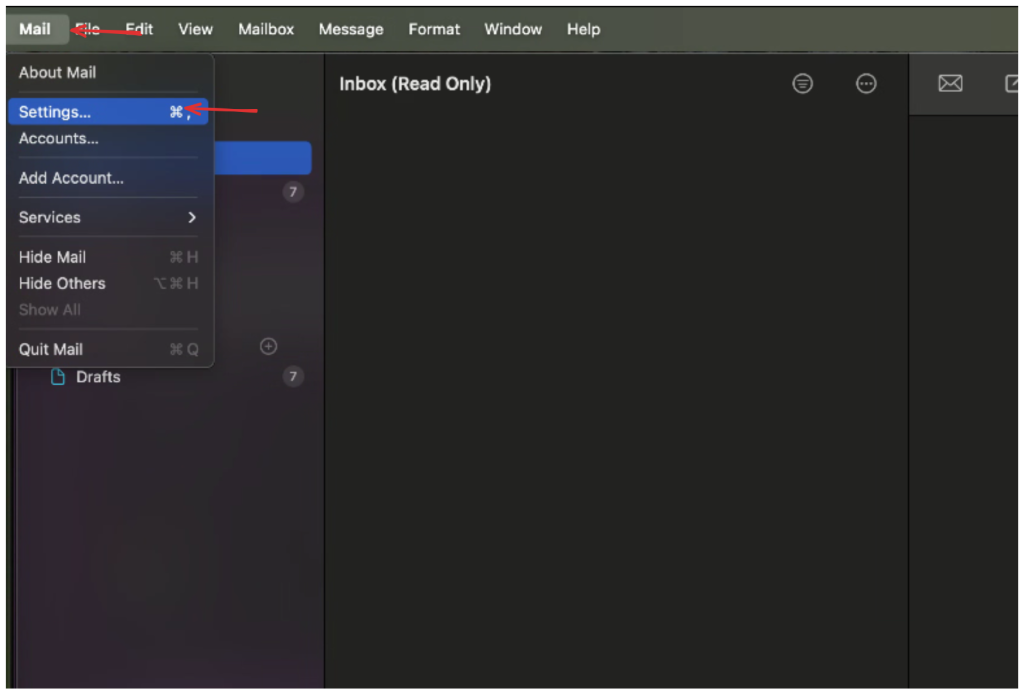
1. With the mail application open, click the tab labeled “Mail” in bold font, at the top left of your screen > Then select “Settings”.
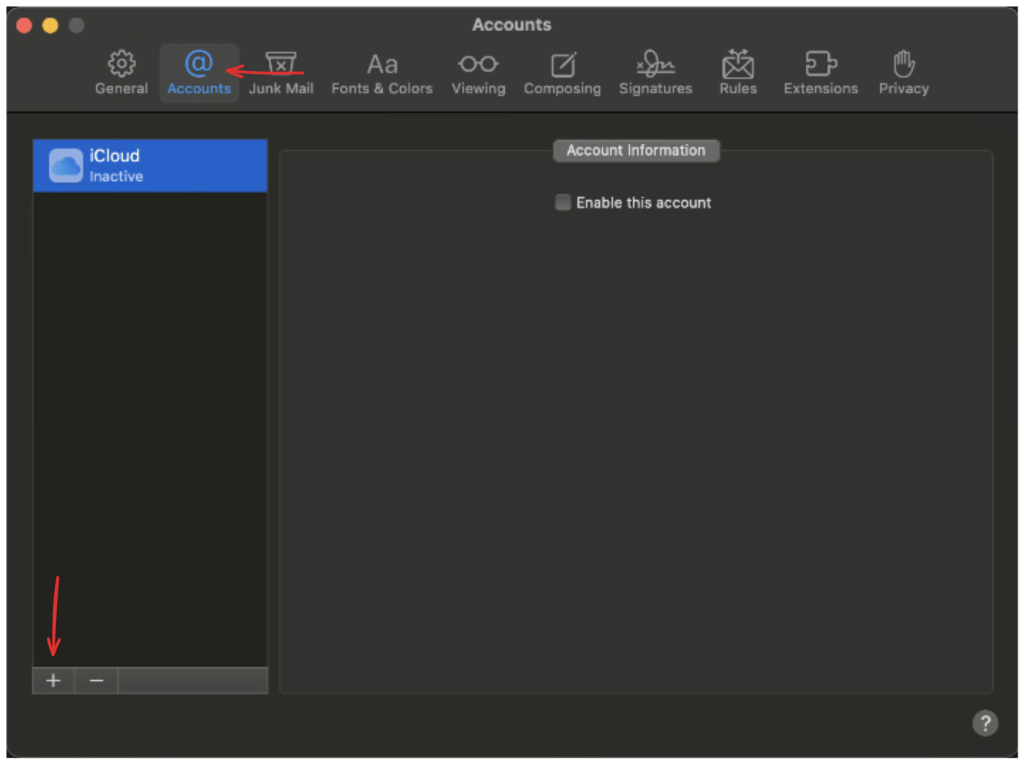
2. Click the Accounts icon > Click the + sign in the bottom-left corner of window.
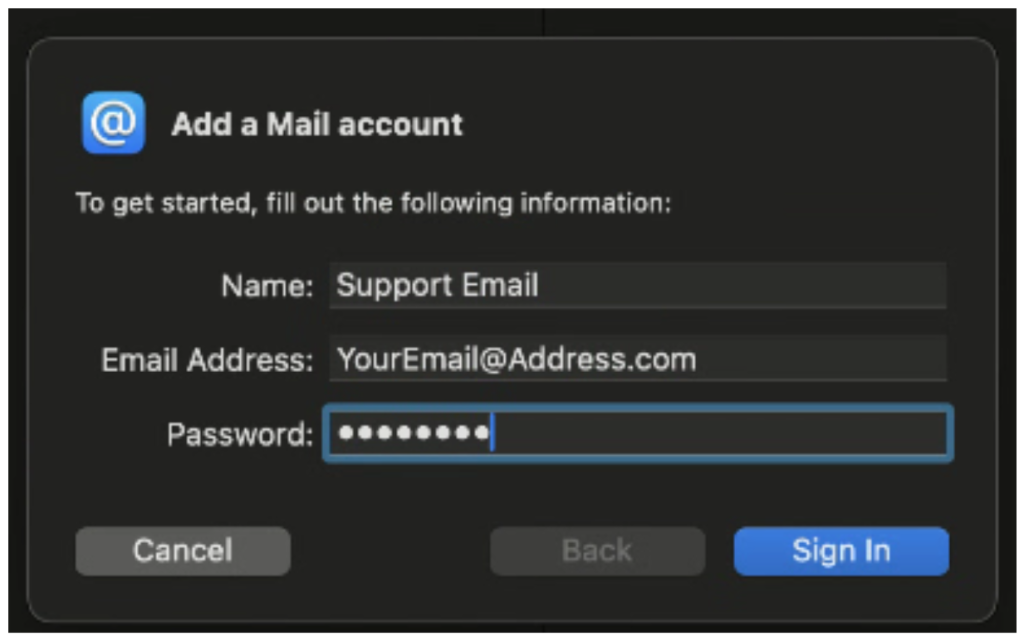
3. Select “Other” as the Account Type > Fill in the details listed(Name, Email, Password). > Then click “Sign In”.
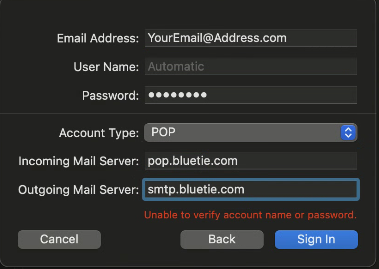
4. This next dialog menu will show up.
Type “pop.bluetie.com” in the Incoming Mail Server field.
Type “smtp.bluetie.com” in the Outgoign Mail Server field.
5. Click “Sign In”, make sure “Mail” is checked and click “Done”. Your email should be set up now!
IMAP Setup
Configuring IMAP Mac Mail
Note: We do not allow the default IMAP account settings used by the Mac Mail program. Please follow our setup instructions very carefully to ensure that the client is configured properly with our servers. If configured incorrectly, IMAP will become disabled for your account.
1. With the mail application open, click the tab labeled “Mail” in bold font, at the top left of your screen > Then select “Settings”.
2. Click the Accounts icon > Click the + sign in the bottom-left corner of window.
3. Select “Other” as the Account Type > Fill in the details listed(Name, Email, Password). > Then click “Sign In”.
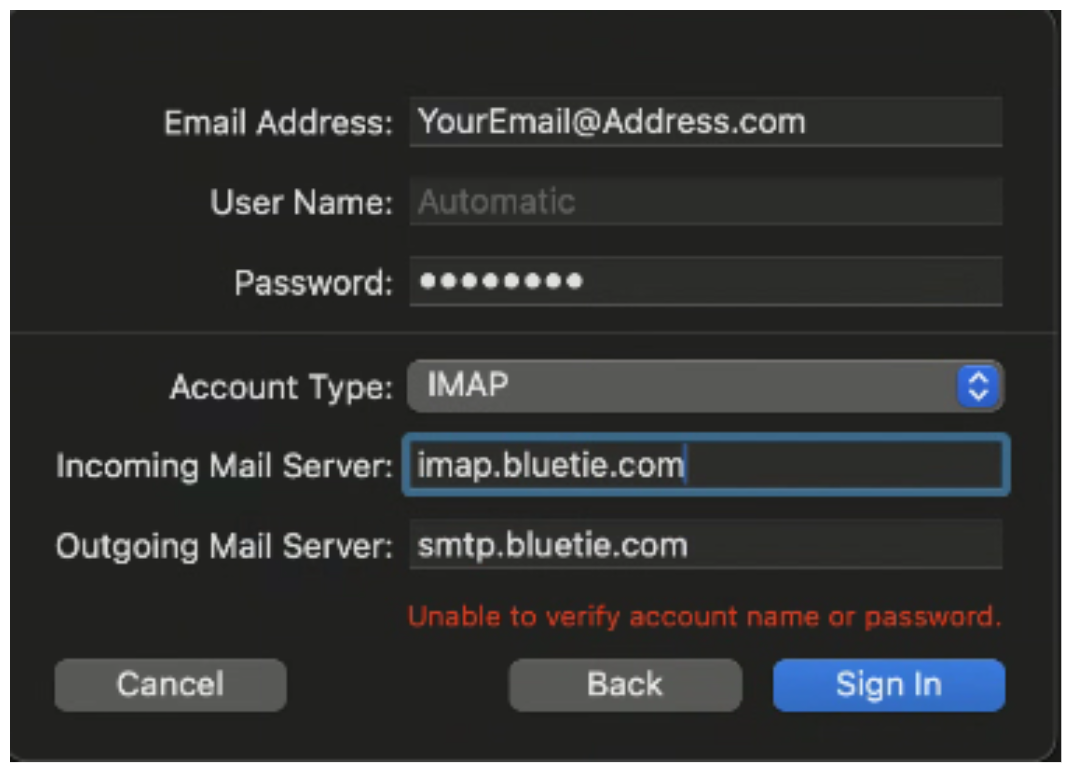
4. This next dialog menu will show up.
Type “imap.bluetie.com” in the Incoming Mail Server field.
Type “smtp.bluetie.com” in the Outgoign Mail Server field.
5. Click “Sign In”, make sure “Mail” is checked and click “Done”. Your email should be set up now!