This tutorial is for users new to our RoundCube web mail interface or users that would just like a refresher.
This is not for users with an @easystreet.net email address.
Link to our webmail: https://webmail.iinet.com/
Login
– Username: Your full email address
– Password: Your email password

Forgot Password?
If you don’t remember your password you can reset it at console.iinet.com here.
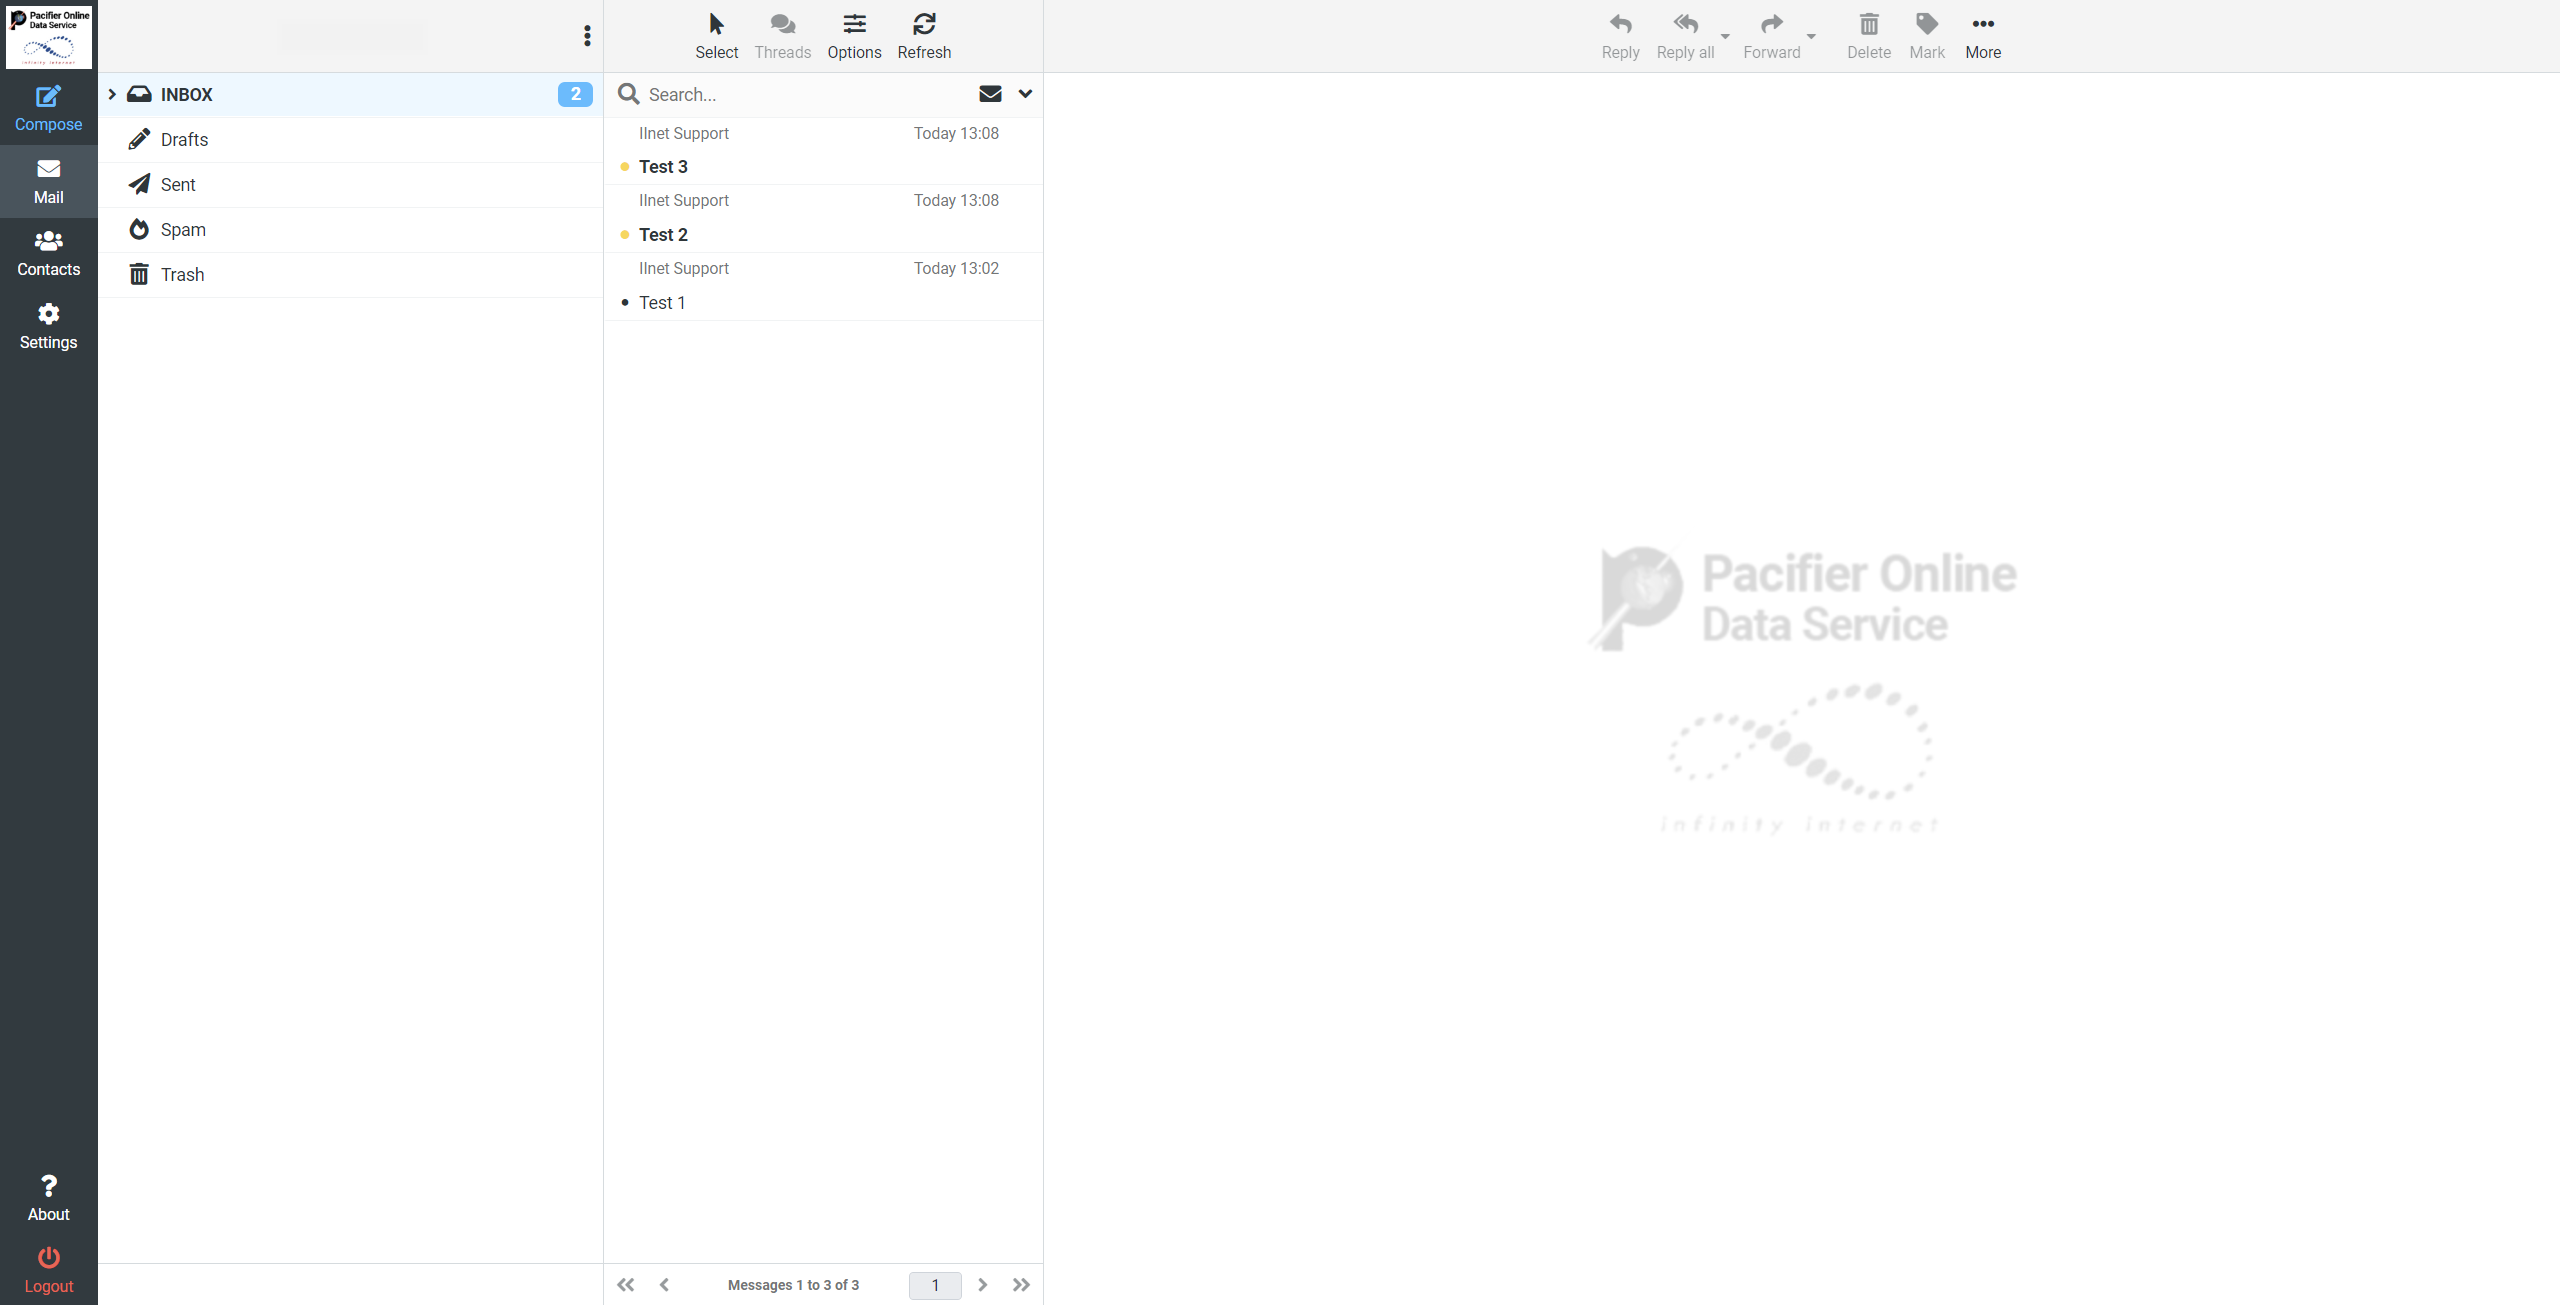
Once Logged in, your screen should look similar to the following
If your screen does not look like the image below, you could have the default zoom on your browser set over 100% causing some of the columns to condense on the screen. If this is the case, then some of the button options will be in a different place for you.
(Click image to enlarge and the browsers ‘back’ button to exit)
How to select multiple emails
Selecting multiple emails may be necessary when performing some tasks, such as organizing emails to a folder or deleting multiple emails. There are several ways to do this, below are a few of the most common ways.
Option 1: Using the Select button
At the top middle of the screen above you should see ‘Select’ with a mouse curser logo. Selecting that will open up a menu with the following items to choose from.
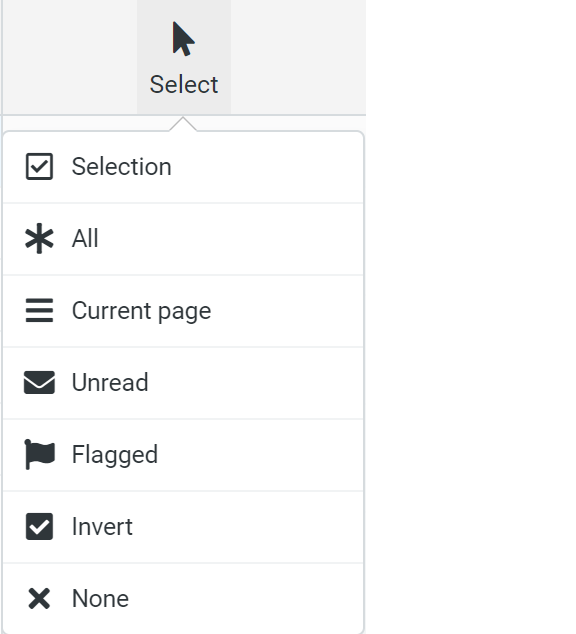
Description:
– Selection: Displays a check box on the left-hand side of your email list (see below)

– All: Selects All emails on EVERY page
** Caution: If you select this option and delete, it will delete ALL emails
– Current page: Selects All emails on CURRENT page
– Unread: Selects only the unread messages
– Flagged: Only highlights emails that have been previously flagged by the user (see below)

– Invert: Highlighting emails, then selecting invert will switch which emails are selected (see below)

– None: Unselects All previously selected emails
Option 2: Using the Shift key
Best use: Moving large chunks of emails
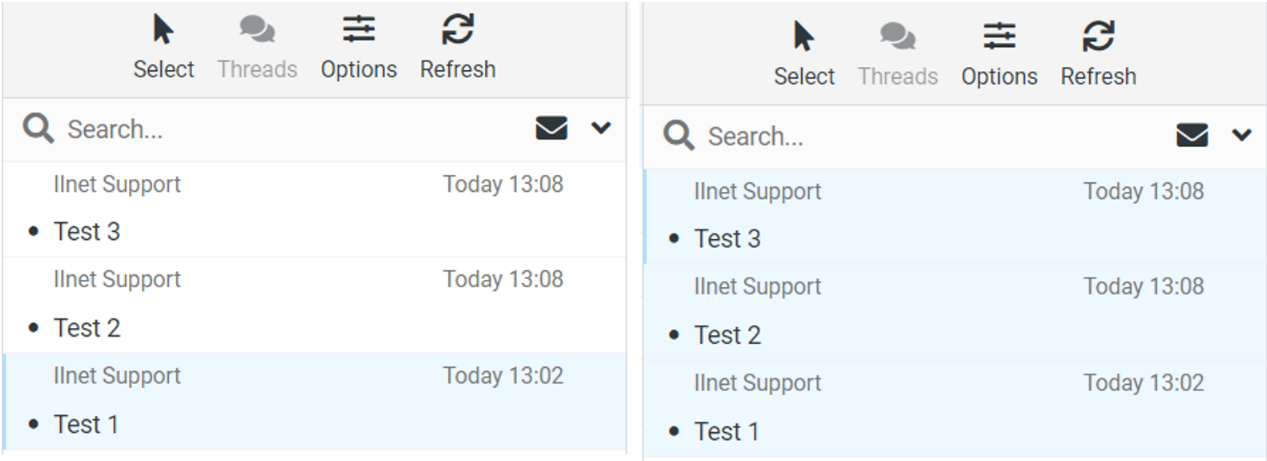
1. Select the first email (see bottom left image)
2. Hold the Shift key and select the topmost email
3. Now all emails between the two you selected should be highlighted (see bottom right image)
Option 3: Using the CTRL key
Best use: Selecting specific emails
1. Select an email by clicking on it (see bottom left image)
2. Hold the CTRL key and select another email, it should highlight blue (see bottom right image)
3. To highlight multiple emails, keep holding the CTRL key down as you select your emails.

How to Delete Emails
After selecting the emails you wish to delete by highlighting them, you can delete them by selecting the delete icon in webmail on the top-right of the screen.

Or by pressing the ‘Delete’ key on your keyboard.
– This may be abbreviated as ‘Del’ on some devices.
** Laptop users: This key may be above the ‘Backspace’ button
** Mac users: You will need to select the ‘Command’ key and ‘Delete’

Spam Filter Settings And Mailbox Rules
If you would like to change your Spam filter settings or adjust your mailbox rules follow our tutorial here
Email Images or Text Not Displaying Correctly
If you are unable to view images or text in your emails, you may have HTML toggled off in your settings. Follow the steps under the example images titled “To Turn on ‘HTML‘” to change the setting.
Example Images with and without HTML

The image above does not allow the screenshot to show. Selecting ‘HTML’ on the right of ‘Details’ will allow the image to be displayed (see below).

You can now see that the ‘HTML’ option has changed to say ‘Plain text’ and the image of a black box appeared.
Clicking ‘HTML’ from within the email is only temporary, to permanently allow for the display of ‘HTML’ follow the steps below.
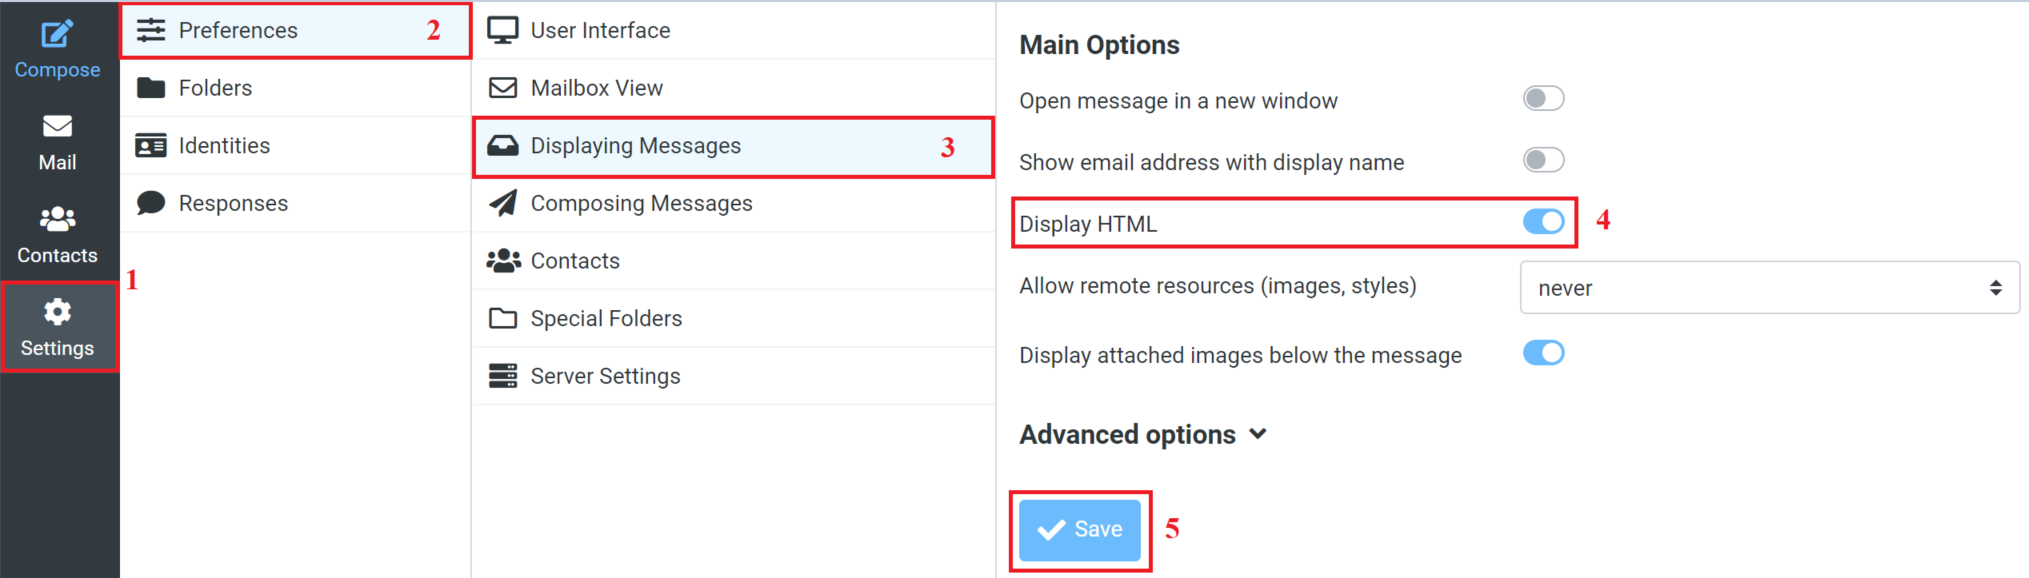
To turn on ‘HTML’
Settings > Preferences > Displaying Messages > Display HTML (toggle on see below) > Save