
Business Email iPhone Setup
Business Email iPhone Setup
1) Click on the Settings app

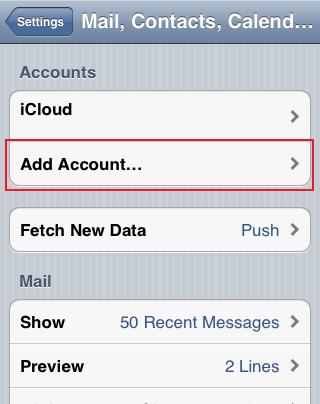
2) Click on Mail, Contacts, Calendars

3) Click on Add Account
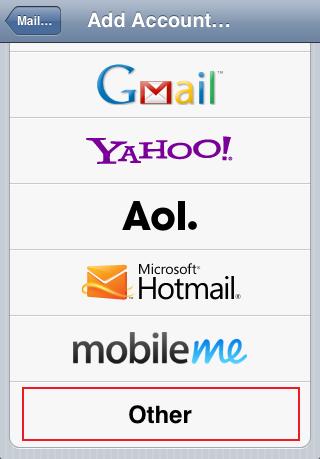
4) Choose Other for the type of account
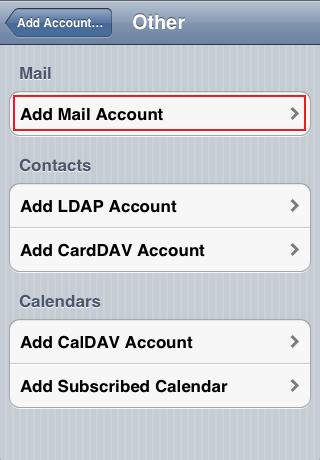
5) Click on Add Mail Account
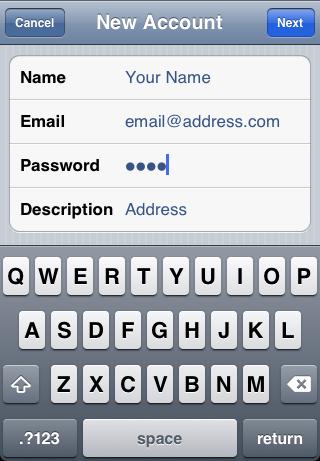
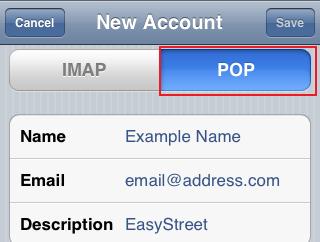
6) Enter the following information:
Name: Your name as you’d like it to appear when you send mail.
Email: Your email address.
Password: Your email password. (Same one you would use to log in at http://easystreetemail.com)
Description: The name you would like this account to be stored under in your phone. Can be anything you like.
Then click Next in the upper right corner.
7) Make sure to select POP as the account type. (It should be highlighted in Blue.)
The Name, Email, and Description should already be filled in with information from the previous screen.
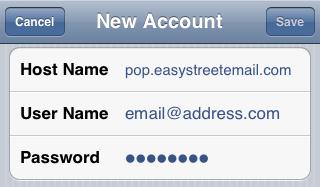
8) Scroll down to the Incoming Mail Server section, and enter the following information:
Host Name: pop.easystreetemail.com
Email: Your email address.
Password: Your email password.
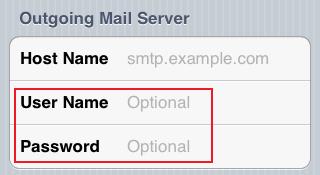
9) Scroll down to the Outgoing Mail Server section.
*WARNING* Apple designed this menu with the word “Optional” in the Username and Password fields for the Outgoing Mail Server. They are NOToptional, and must be filled in.
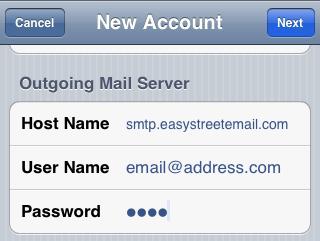
10) In the Outgoing Mail Server section, enter the following information:
Host Name: smtp.easystreetemail.com
Email: Your email address.
Password: Your email password.
11) You have entered all of the required settings to configure your account.
Click Next and/or Save in the upper right corner, then do so again on the next screen if prompted to do so.
*You may see error messages at this point, but 2 types of errors are OK*
1) If you see an error message that says “Cannot Verify Server Identity“, it is OK. Just click Continue. It may even happen a second time (once for incoming, once for outgoing), but do not worry. Simply Click Continue again
2) If you see an error message that says “Cannot Connect using SSL“, it is OK. Just click Yes to continue setup without using SSL.
You should now be back at the list of Accounts saved on your iPhone.
Congratulations! You have completed the iPhone email setup.