
Windows: Thunderbird

If this is your first time setting up an email on Thunderbird, proceed to step 4.
**NOTE: If you have an email ending in @iinet, @tstonramp, @pacifier, @nwlink, @proaxis use ‘iinet’ in the hostname when reaching step 6.
This tutorial does not apply to @easystreet accounts.
- Open up Thunderbird
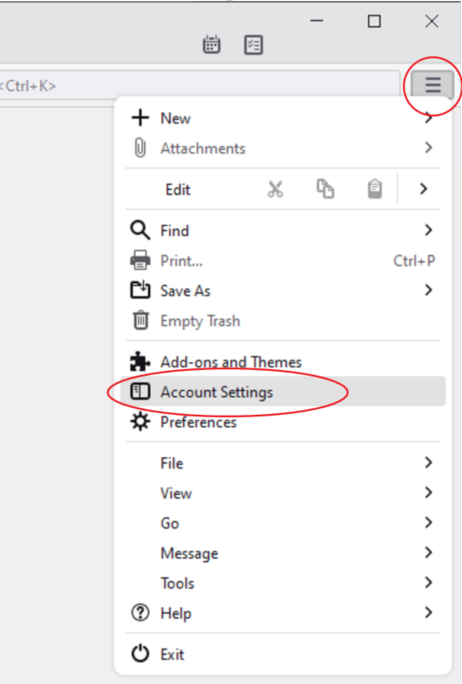
- In the top right corner select the menu button (three dashed lines) > Account Settings
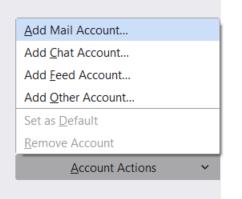
- A new tab will appear. On the bottom left select Account Actions > Add Mail Account…
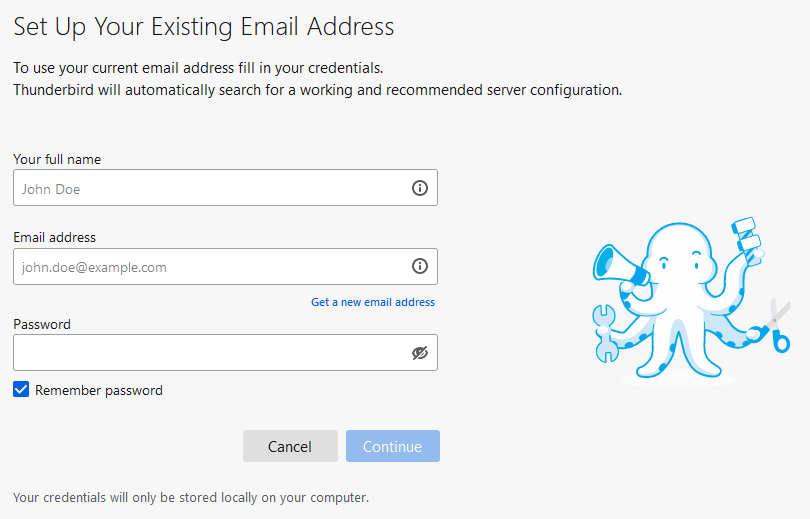
- Insert the name you would like displayed when sending emails, full email address, and password. Then hit Configure manually.
- Thunderbird will try to configure for you. The two available configurations are IMAP or POP3. Select one > then click “Configure Manually”
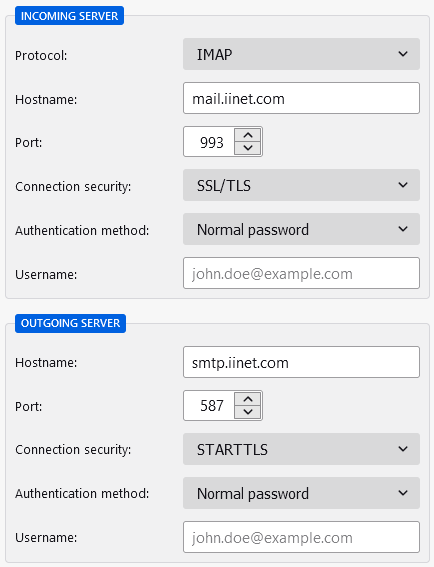
- Select either the IMAP or POP protocol and follow the configuration settings below.
– IMAP is good for keeping multiple devices in sync (recommended)
– POP downloads emails to the one device and removes them from the server- If IMAP was selected check to make sure the following matches:
Incoming server:
– Protocol: IMAP
– Hostname: mail.iinet.com
– Port: 993
– Connection Security: SSL/TLS
– Authentication method: Normal password
– Username: your full email address
Outgoing server:
– Hostname: smtp.iinet.com
– Port: 587
– Connection Security: STARTTLS
– Authentication method: Normal password
– Username: your full email address
- If IMAP was selected check to make sure the following matches:
- If POP3 was selected check to make sure the following matches:
Incoming server:
– Protocol: POP3
– Hostname: mail.iinet.com
– Port: 995
– Connection Security: SSL/TLS
– Authentication method: Normal password
– Username: your full email address
Outgoing server:
– Hostname: smtp.iinet.com
– Port: 587
– Connection Security: STARTTLS
– Authentication method: Normal password
– Username: your full email address

- Select next. If you would like to connect linked services you can do this now, otherwise, select ‘Finish’.
Your email should now be setup.