
Windows: Outlook 2016
If you are having trouble sending/receiving email click here.
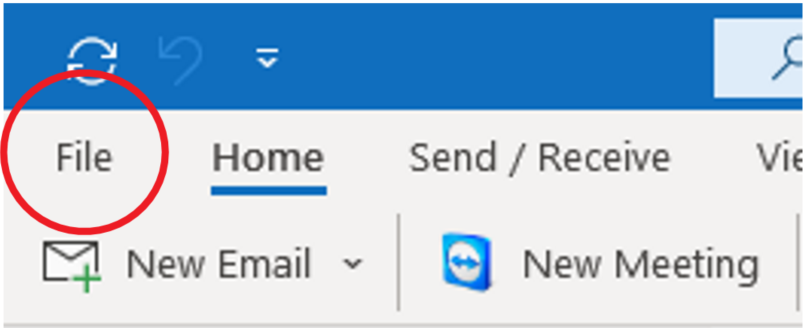
- From the start menu open the Outlook app. Then, select ‘File’ on the top left corner of the screen.
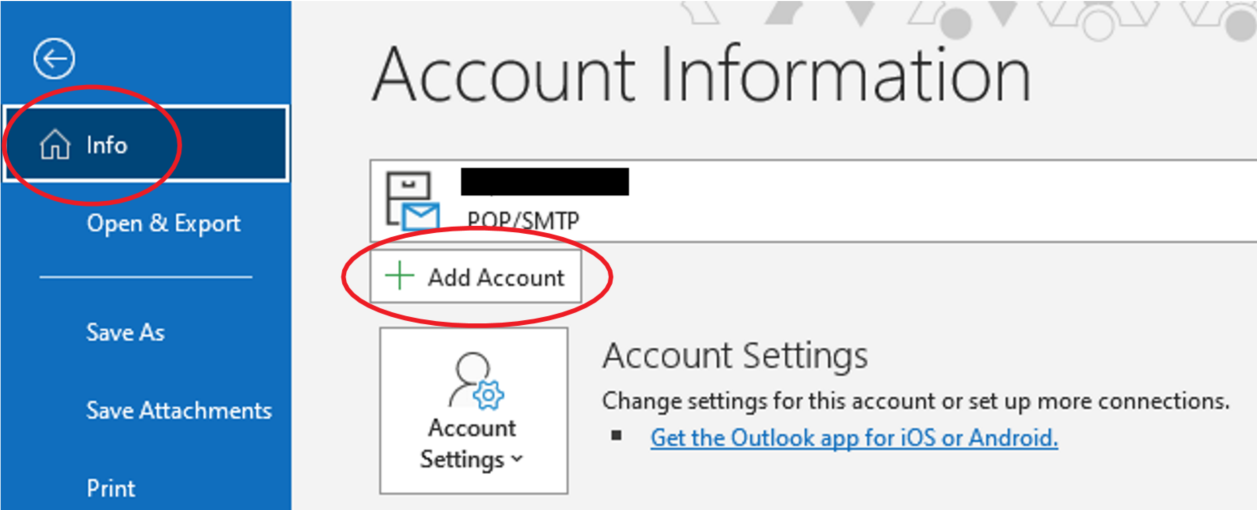
- Select Info > Add Account
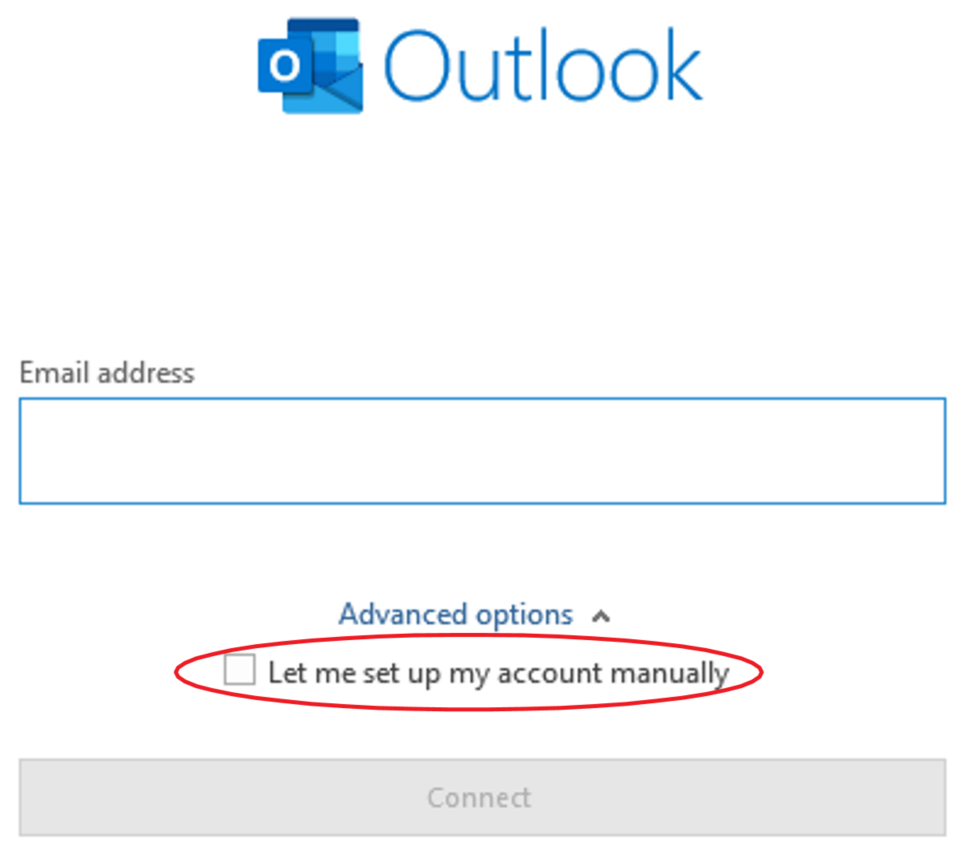
- A pop up will appear:
1. Insert your email address
2. Click on ‘Advanced options’ and check the box for ‘Let me set up my account manually’
3. Select ‘Connect’
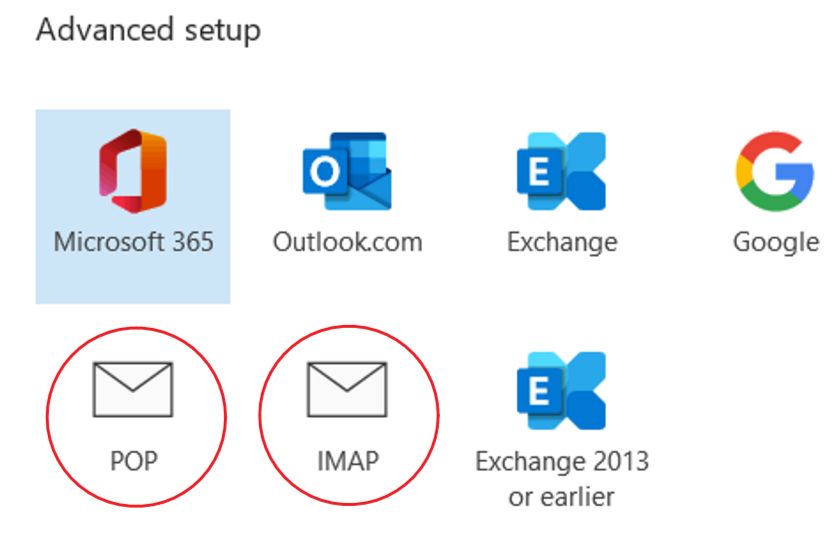
- In the Advanced setup menu select POP or IMAP
– IMAP is preferred if using to log into the same email on multiple devices
- It will prompt you to input the password associated with that email account. Input the password and continue.
- If you have an email ending in @iinet.com:
– The next window will contain a prompt telling you that your account was successfully added; Proceed to step 7.
If you have an email ending in anything other than @iinet, i.e. @pacifier, @proaxis, etc follow the server settings below
(@easystreet.com users, please click here for the proper tutorial)
– The next window will ask you for some configurations regarding your account. Input the following:
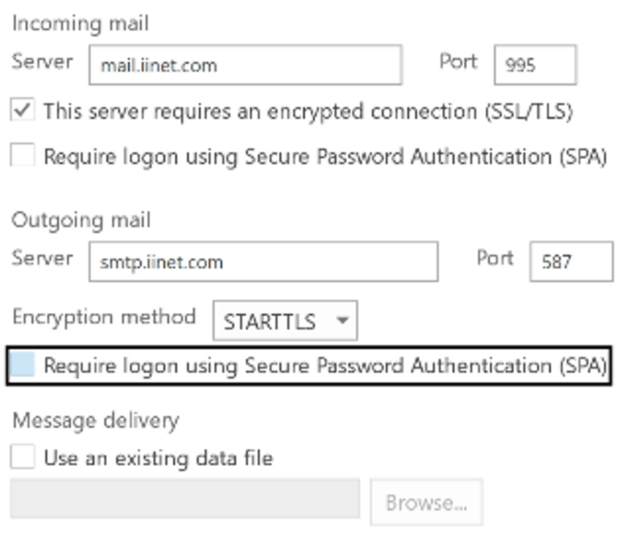
Incoming mail:
– User name: your full email address
– Password: your password
– Server: mail.iinet.com
– Port: 995 for POP, 993 for IMAP
– Check the box for “This server requires an encrypted connection (SSL/TLS)”
Outgoing mail:
– Server: smtp.iinet.com
– Port: 587
– Encryption method: STARTTLS
– *If available* Check the box for “My outgoing (SMTP) server requires authentication”
Select Next
– The next window will contain a prompt telling you that your account was successfully added; If you selected POP, proceed to step 7 and if you selected IMAP, your email should now be setup.
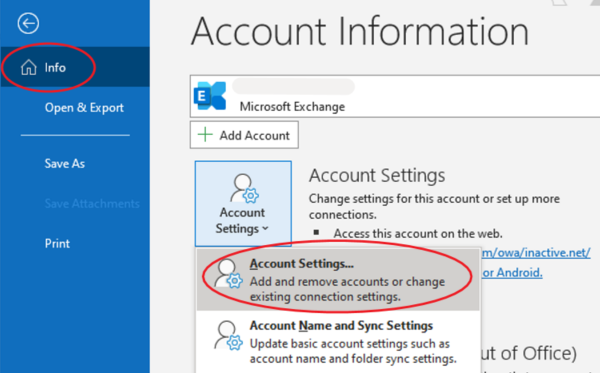
- POP: Once you have selected done. Go into File > Account Settings > Account Settings
- Select the email account that was just added and under Mail Settings/ Another pop up will appear. Make sure the box for ‘Leave a copy of messages on the server’ is checked and ‘Remove from server after x days’ is unchecked.
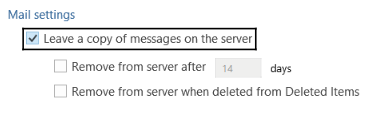
- Select ‘Next’ and click ‘Done’.
You should now be able to get mail.